PAGE KEYWORDS : SONY DSC-W1 CAMERA DUST REMOVAL CCD OPEN TUTORIAL WALKTHOUGH
Here you are… Bored with dust on your CCD ? I was too. I found instructions on the internet (http://forums.dpreview.com/forums/read.asp?forum=1009&message=19895748) to remove the dust form a DSC-P100. As I own one, I decided to test that method. I successfully blew the dust out of the CCD.
I browsed the web searching for a solution for my sister’s DSC-W1 … Nothing…
So, with a lot of courage, I decided to open it !
Here are some pics to help you do it yourself !
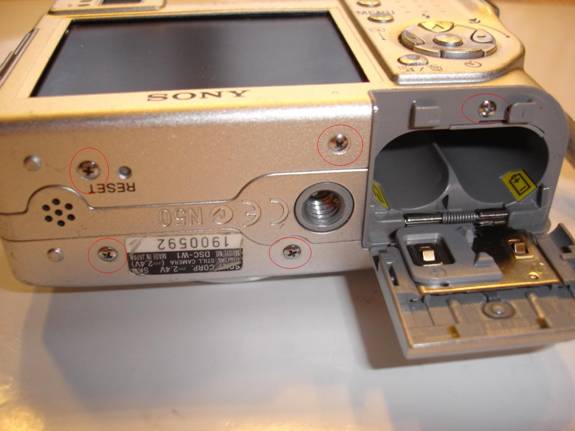
Remove those five screws
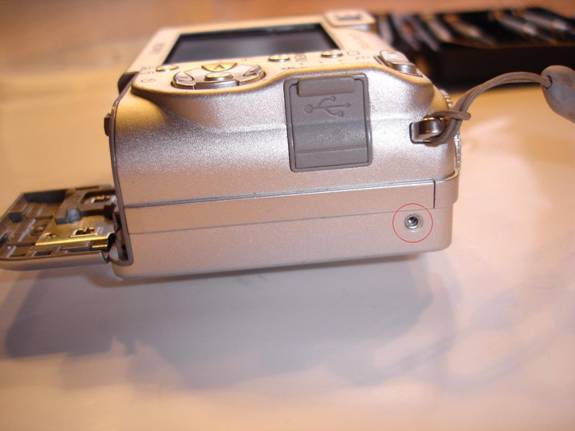
Remove this screw too.

And finally remove this screw too.
Once you removed all screws, you can remove the covers. Begin with the back cover as it is easier. Try inserting a nail or a small screwdriver in between the small gaps that opens. Do it carefully and it should come out pretty easily.
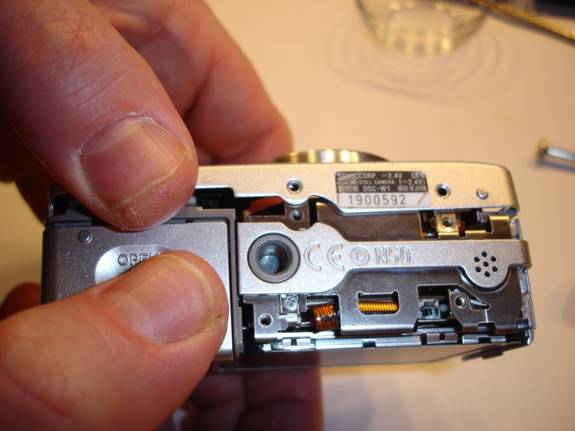
Once this is done, you can remove the front cover. BE CAREFUL when you remove the front cover, there is a small wire that connects the microphone to the main board. You can remove the microphone from the cover to free it. (be careful not to loose the small foam disc that protects the mic).
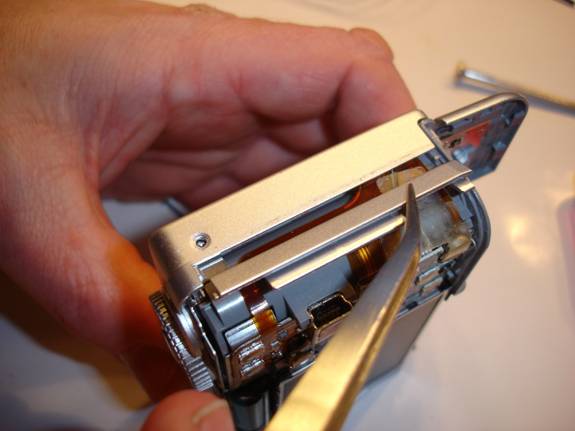
On this picture, only the backside is removed : you have to be careful with the “mobile” parts, you’d better take them away carefully.
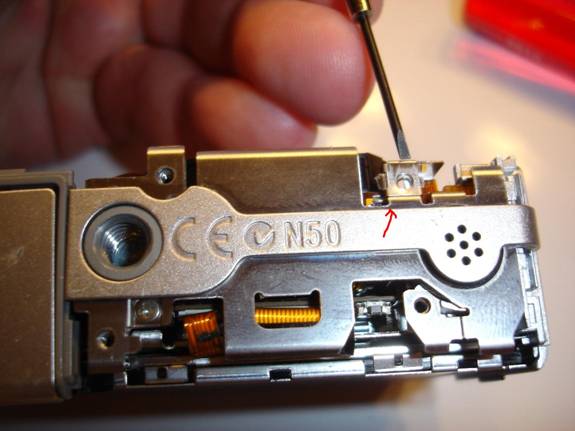
You’ll need to remove the bottom part of your camera : the part with the tripod thread. Once the from cover is away you’ll see that this part is pretty loose. The only thing that keeps the parts together is marked here with a red arrow.
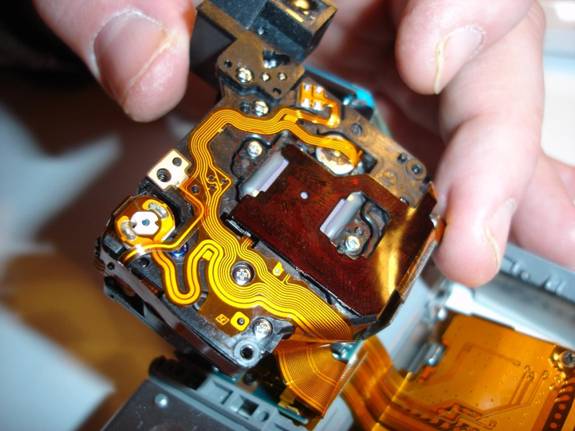
When this is away, you have to remove the head part, the part with the command button. To do this, look closely at the side parts that remain, you’ll see there are little plastic hooks that keep the parts together. They are very easy to remove. When the cover is away, you have to put the FLASH part on the side, to get an easy access to the black part, which is the lens+ccd housing. Remember that the Capacitor may be charged, to keep your fingers off the contacts !
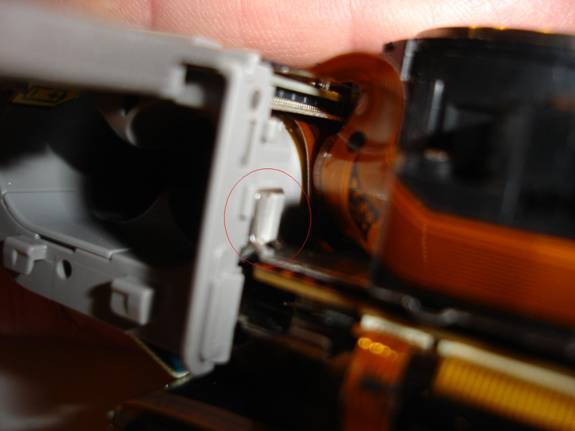
The black housing (lens + ccd : on the right of the picture) is kept in place with TWO (!!) little hooks (metal vs plastic = CAREFUL !). See the next picture :
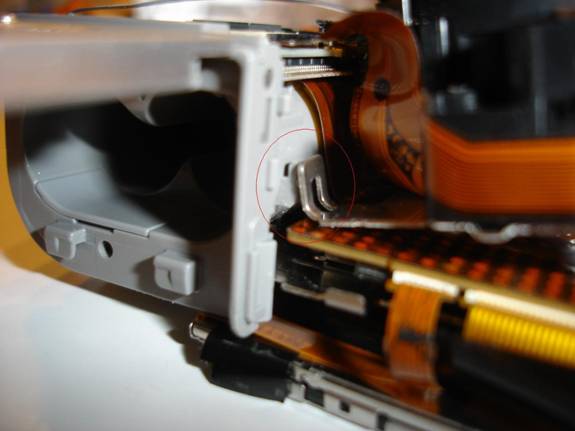
So to remove it, gently take the black part up.
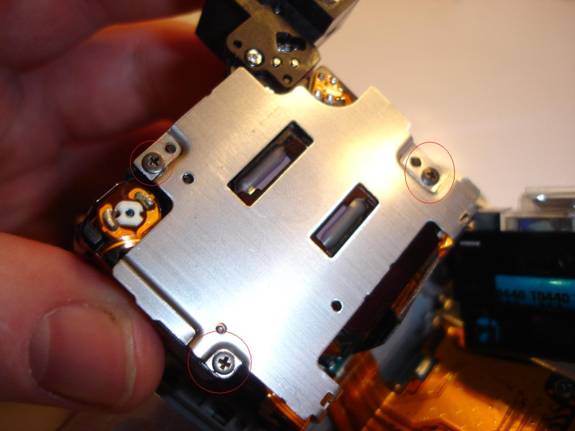
Once you’ve removed the lens+ccd part out of the hooks, turn it around, you’ll see that metal plate. Remove those 3 screws.
Underneath the metal plate, you’ll see that. The two red circled screws keep the CCD in place. From now on, you have to assure that you are in a (as much as possible) dust-free environment. Remove those screws to gain access to the CCD.
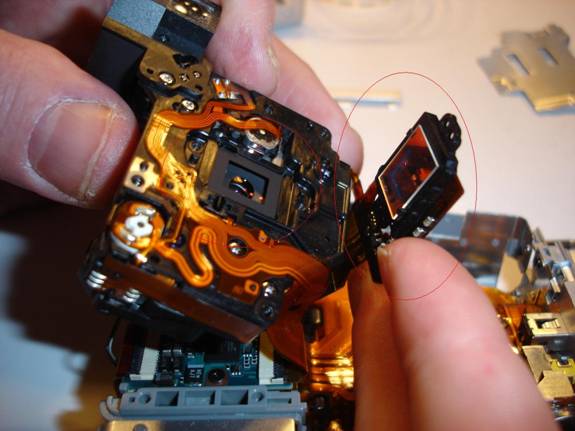
So, here we are !!! Left is the access to the lens, the small black frame may move when removing the ccd, take it carefully as it’s very thin. Now, you can see the Huuuuuuuuuuuuge dust part on my CCD on the right. Blow it away with a small pump (football pump, photographic pump used to clean lenses). NEVER BLOW yourself (with your mouth, I mean), NEVER use aerosols !!
All you have to do next is to go back, bring all parts back together and test your favorite DSC !!!